Friday, October 28, 2011

Fall Stitch School: Jacobean Couching

This stitch is called by everyone Jacobean Couching, but everyone also seems to have another name for it, like Laid Filling or Trellis Stitch. This stitch is one of the classic crewel embroidery stitches. It creates a nice patterned filling stitch and is often used in stitching larger areas.

There are three steps to this stitch, making a grid of long stitches which can be either upright or at an angle, anchoring down the long stitches at the intersections, and making a filling stitch in the grid's squares or diamonds. Actually the filling stitch is optional, but it's very common to have one.

It's straightforward enough to make the grid. Making an upright grid is easiest, the diagonal grids can be a real challenge, since it's so easy to change the angles.
Then make small anchoring stitches. These can be whole crosses or half or some other variation of your choosing, but they really are a must as they hold down some very long stitches.
Then I just added a simple filling of french knots.
I made a few other samples. The first is with a diagonal filling and a single horizontal anchoring stitch.
Another option for fillings is detached chain stitches.
And finally, you can do a satin stitch filling, but you stitch this first, then the grid on top of it, followed by the anchoring stitches.
An example of this stitch used in a project.
It's an easy way to add some interest to a larger filled area.

I hope this lesson was useful! There will be a little project to stitch at the end of this Fall Stitch School lesson, so you can practice a bit of crewel embroidery yourself!

Tuesday, October 25, 2011

Embroidery Exercise

Hi, all. I found a little embroidery exercise in an embroidery book I picked up at a flea market. I thought it was worth sharing, and maybe some of you might like to try it. First though, I have to say that to allow yourself to do this, you have to turn off your inner critic. This isn't about making a fabulous project, or making any thing at all. It's just to practice stitches. Let your needle and your fingers work together without so much steering from your brain.

Gather up all the different white threads, yarns, and flosses you can find, thick and thin.
Here is my collection that I used. If your wondering where to get all these fibers, my advice is to try flea markets. I picked up many there. Even if you have a limited selection of threads, don't let that stop you from the exercise, you can use what you have. Feel free to compliment your threads with buttons and beads as you like.

Next, pick out a piece of a looser brown or tan woven fabric. A linen or sack cloth type of fabric is perfect. What you will do is make stitches, bunches of stitches of all kinds to cover your cloth. Feel free to use a stitch book to help you try new stitches. Don't worry if they aren't perfect, that isn't the point. Combine the threads in different ways, use several at once on your needle. As you make your stitches, don't make them regular, vary the size and shapes and angles, make them overlap, switch between stitches, however you feel as your work the stitches. Don't tell yourself it's not good enough because that is not the point with the exercise. I just bet at the end you will see some interesting textures and structures emerge.

Here is my result:
I most certainly did battle with my inner critic, but I didn't let it win. I continued until I felt satisfied with the amount of stitches. And I can say that I definitely found a few interesting effects in there.

The books suggests that this exercise is a "must" if you want to do free-style embroidery. I can definitely understand the author's reasoning. If you like this, you can try it again, or you can try it with some idea of making an actual composition. I myself have never really tried free style embroidery - too much of a pattern person, but never say never! Perhaps it just might show up in stitch school someday, but until then, I got to go practice a bit more. ;)

Saturday, October 22, 2011

Fall Stitch School: Long and Short Stitch

Welcome to another week of Fall Stitch School. This week, we're studying long and short stitch. This stitch is troublesome for many embroiderers, but I'm hopefully going to show you that it is not any harder than any other stitch and it can be quite fun to fill an area in. Long and short is very useful not only in crewel embroidery, but thread painting as well. Embroiderers can achieve beautiful shading affects with this stitch. It really is worth a little practice to improve your technique and gain confidence in your abilities.

The basic idea behind long and short stitching is simply to vary the starting and ending points of the stitches so that you can get a smoother color shift and to be able to easily stitch contours. I've made three sample shapes with long and short to show you a couple ways to use it. The first thing to do in crewel embroidery and (thread painting too) is to outline your shapes with split stitch or split back stitch.


First shape is a basic box. The first row of stitches is composed of some longer and some shorter stitches. For the rows following, you use only long stitches (except at the end of the shape, of course), but this isn't a precise science, so the stitches will have some natural variation in length anyways.
Notice my stitches aren't made perfectly even with each other. You will see that it hardly matters, in fact maybe it's better because it's so important to vary the placement. I went ahead and added another row of this color. It's very important to always, always bring the needle UP through the stitches and never down into them.
The next row of stitches is started by bringing your needle up in the color above.
Again you see I haven't made a perfect row of stitches. It looks a little odd in this contrived example, but in a real project, it will look fine with the variation. Start the next row bringing your needle up through the color above. This picture shows how far in you need to bring the needle up - it can be surprisingly far in.
 

The next shape is a flower petal. Another thing to keep in mind, is that it's important to work from the outside edge inward. This example shows how you may need to change the angle of your stitches to get a nice shape.
Some of the shorter stitches end up tucked under the longer stitches since the stitches are converging toward a single point and there won't be room for them all.

The most challenging (and fun!) thing to do is fill complicated shapes that bend around curves. This is particularly useful when filling animal shapes. 
To move around a curve, you  make stitches with varying starting and end points (this is really important for the making a nice filling), but the angle of the stitches changes a bit as you move around the stitch. The stitches are placed quite far up into the row of stitches above. Only a little part of each stitch is left showing, so you get a nice progression of stitches at different angles as you move around the curves. If you make the stitches a little shorter you will get a really smooth curve.


Here you see all three shapes filled in. I have limited colors on hand, but I think that you can still see the potential this stitch offers.
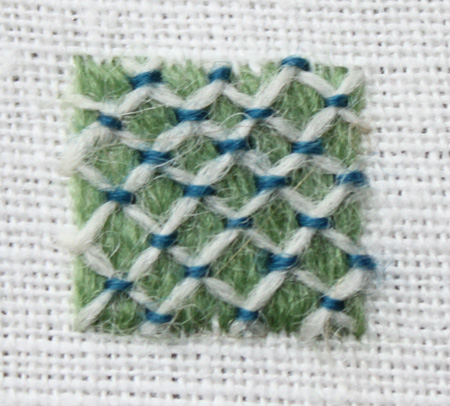
I have a small example from a project stitched with long and short using crewel wool. You can see how I have made contours around the shape of the animal

I hope this lesson was helpful in demystifying long and short stitching just a little bit. Give it a try! It's not so hard as it seems. :)

Friday, October 7, 2011

Fall Stitch School: Crewel Embroidery

It's finally here! For this season's stitch school I am trying something a little different, which will be to focus on a type of stitching instead of just a bunch of more or less random stitches. This is still all about the stitches, of course, but I will pick stitches traditionally used for crewel embroidery. At this point I am not entirely sure how many weeks I will run this, but I promise you at least 6, not including this introduction.

So, the first question is what is crewel embroidery? I read up a bit to see what today's embroiderer's say about it. There are basically two opinions. The first is that it is defined by the type of yarns chosen, ie 2-ply wool yarns of varying thicknesses. The stitches are a bit secondary, as many types of stitches can be used. Other embroiderer's are a bit looser with the definition and think it's ok to use other types of threads as long as you are using stitches fairly typical to crewel embroidery. I am not taking a side in this debate, but in this stitch school, I am sticking with wool mostly because I enjoy them and because they sit a bit higher on the fabric since they are generally thicker than other threads - some think this is an important component of what crewel embroidery is.

A crewel-type project, but with cotton threads.


Crewel embroidery has a very long history. The Bayeaux tapestry stitch about 1000 years ago is considered a crewel embroidery. The embroiderers used only 8 colors to create this magnificent embroidery. It's definitely worth a look at. I took a quite peek at a book about in the library the other day, and they really made interesting use of the stitches to create textures and lines. Crewel embroidery has gone in and out of fashion. In the 17th century is was popular and is often called Jacobean embroidery. Many of you may think of the 70s when you think of crewel with its browns and oranges and avocado greens when this type of stitching enjoyed a bit of popularity. Today's crewelers have a multitude of patterns to choose from traditional to contemporary.  There really isn't any rule for what type of design can be used in crewel embroidery. And really, you can make any type of pattern into a crewel project by the threads and stitch choice.

Ladybug project stitched with Appleton crewel wools.

As far as fabric choice goes, there are many options. Often linen or linen-cotton blends are chosen because they have a looser weave so there is a little more room for drawing the needle through the fabric. In Sweden, they just call it wool embroidery rather than crewel, but it really is a type of crewel embroidery, but it is quite common to use thick wool felt to stitch on.

The stitches are divided into 6 categories: outline stitching, satin, couched stitches, seed stitches, french knots, and long and short (some people call this soft shading). I will go through these 6 types in the following weeks. Outline stitching and couched stitches have the most variation as far as types of stitches, the others are just one type of stitch. Crewel embroidery often uses a mix of stitches and filling and lines to create interest and textures. I will try to highlight some of the possibilities with these stitches in the coming weeks. Hopefully you will get inspired to try a bit of crewel yourself!!